I’ve been moving more and more into using MVC and the Razor view engine in my projects; however, sometimes I still like web forms. Yes, you read that correctly! Now, if you haven’t written me off as just a stone age Luddite—and are interested in a simple step-by-step explanation of how to convert an HTML page into an ASP.NET Master Page, then keep reading. And yes, I do know that you can use ASPX as the view engine for MVC. ![]()
I decided to post this after finding it very difficult to find a simple “step-by-step” online to show my students.
Step by Step Instructions
1. Make sure all of your site assets are already put together in a single project inside of Visual Studio (i.e. images, scripts, css, etc). In my case I have an index.html page that holds the HTML that I want to convert to a MasterPage, a css file that is referenced at the same level as the index page, and an images folder. [For this example I’m using the free “Corners” template found at www.templatemo.com, an awesome free templates website.] 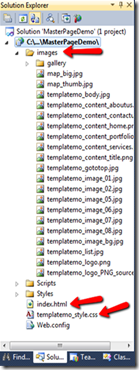
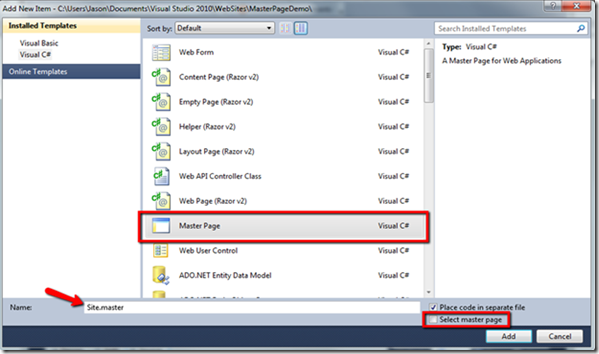
2. Add a MasterPage to your site by right-clicking the Project and choosing Add New Item > Master Page, then click Add. 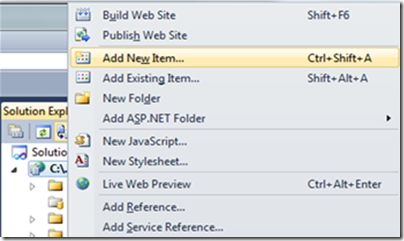
3. Then delete everything below the Master Directive in the new Master Page. 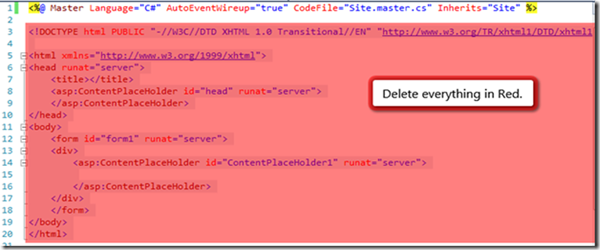
4. Then copy all of the HTML from your existing HTML page below the Master directive. 
5. Add a ContentPlaceHolder to the <head> tag with a meaningful ID (e.g. “HeadContent”) 
6. Add opening and closing “form” tags around everything inside the <body> tag as shown below. 
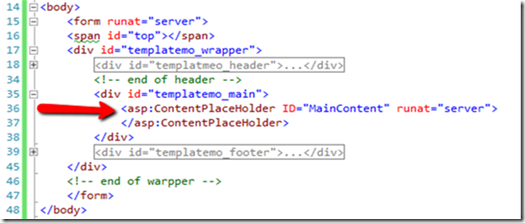
7. This is the step that can be a little trickier, or at least more subjective. Choose the section of your html that you want to be the “MainContent” area, and remove all the existing HTML from that area—replacing it with a ContentPlaceHolder control. NOTE: you may want to paste the HTML you remove into a some other file now for safe keeping in case you desire to use it in a Content page later. 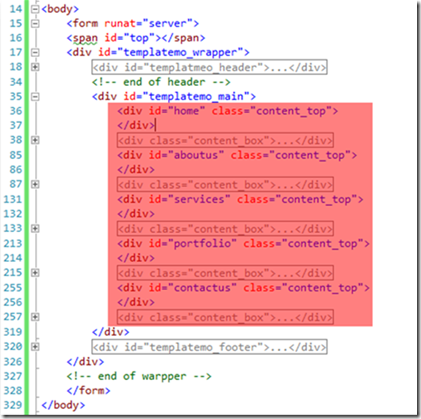
8. Be sure to Save the changes to your MasterPage. Also, at this point you may choose to add any additional ContentPlaceHolders that you may want.
9. Now to add a new page using your master page you need to right-click on the project, and go to Add New Item > Web Form, and be sure to check the “Select master page” check box as indicated below. 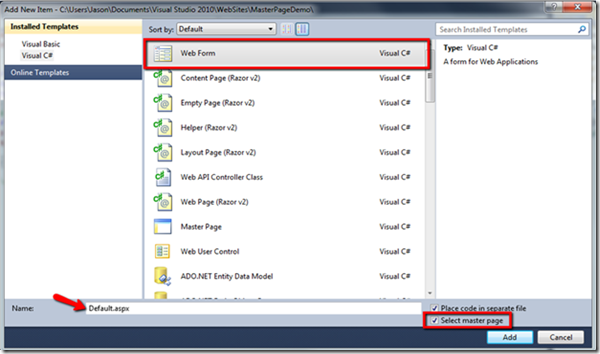
a. Clicking Add will cause the “Select a Master Page” dialog to show. Highlight your new MasterPage, then click OK. 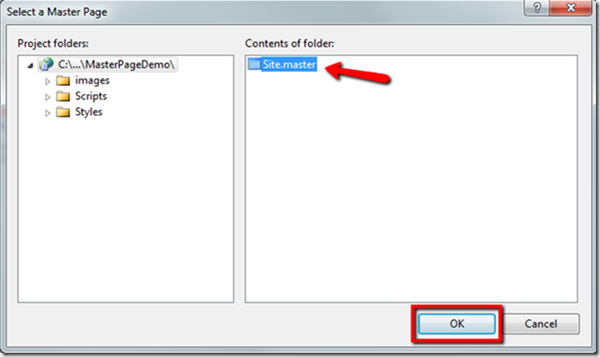
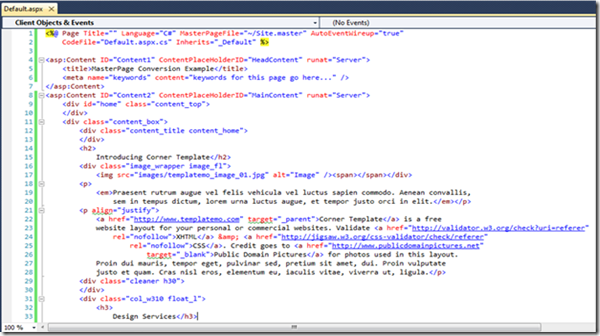
10. You should now see a new page open that clearly indicates it is referencing your new Site.master page, and has a Content control for each of the ContentPlaceHolder controls that you added to your master page. 
11. Now you can begin to add head and content information to the new content page. You may choose at this point to paste in the HTML that you removed from the “MainContent” section of the MasterPage into the “MainContent” Content control. 