If you are creating a SharePoint Workflow with a Delay Activity in Visual Studio, and want to be able to change the delay timeout through a configuration file—for example: to have a short delay for testing and a longer delay in production without having to recompile your code—then this setup is actually quite simple.
I’ve decided to write this short post because, although this is really the same as reading a config entry from any other .NET based program, SharePoint workflows can be a little intimidating and make you think that things aren’t as simple as they are in, say for example, a straight ASP.NET web forms app.
However, it really is this simple:
- Add an AppSettings entry to the web.config in your Virtual Directory location (i.e. C:\inetpub\wwwroot\wss\VirtualDirectories\MySharePointSite\web.config) something like this:
- Read the app setting value from the code behind of your workflow for the delay activity in the Invoked event handler (notice I put a default value in the else block) :
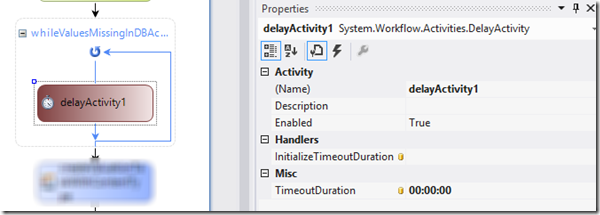
- For your reference, here is what my Properties window looks like in this scenario:
<appSettings>
<add key=”WorkflowDelayTimeoutDuration” value=”00:05:00″/>
</appSettings>
private void onWorkflowActivated1_Invoked(object sender, ExternalDataEventArgs e)

{

workflowId = workflowProperties.WorkflowId;
    if (ConfigurationManager.AppSettings["WorkflowDelayTimeoutDuration"] != null)

{

delayActivity1.TimeoutDuration = TimeSpan.Parse(ConfigurationManager.AppSettings["WorkflowDelayTimeoutDuration"]);

}

else

{

delayActivity1.TimeoutDuration = new TimeSpan(1, 0, 0);

}

}
